

Understanding API Gateways: An Introduction to Kong API Gateway: Part-1


Introduction
Discover the groundbreaking Kong API Gateway, a powerhouse redefining API management. Uncover its intuitive design, top-notch security, and unmatched scalability in this series. Join us to explore its impact on industries and its role in revolutionizing connectivity for the digital age.
What is an API gateway?
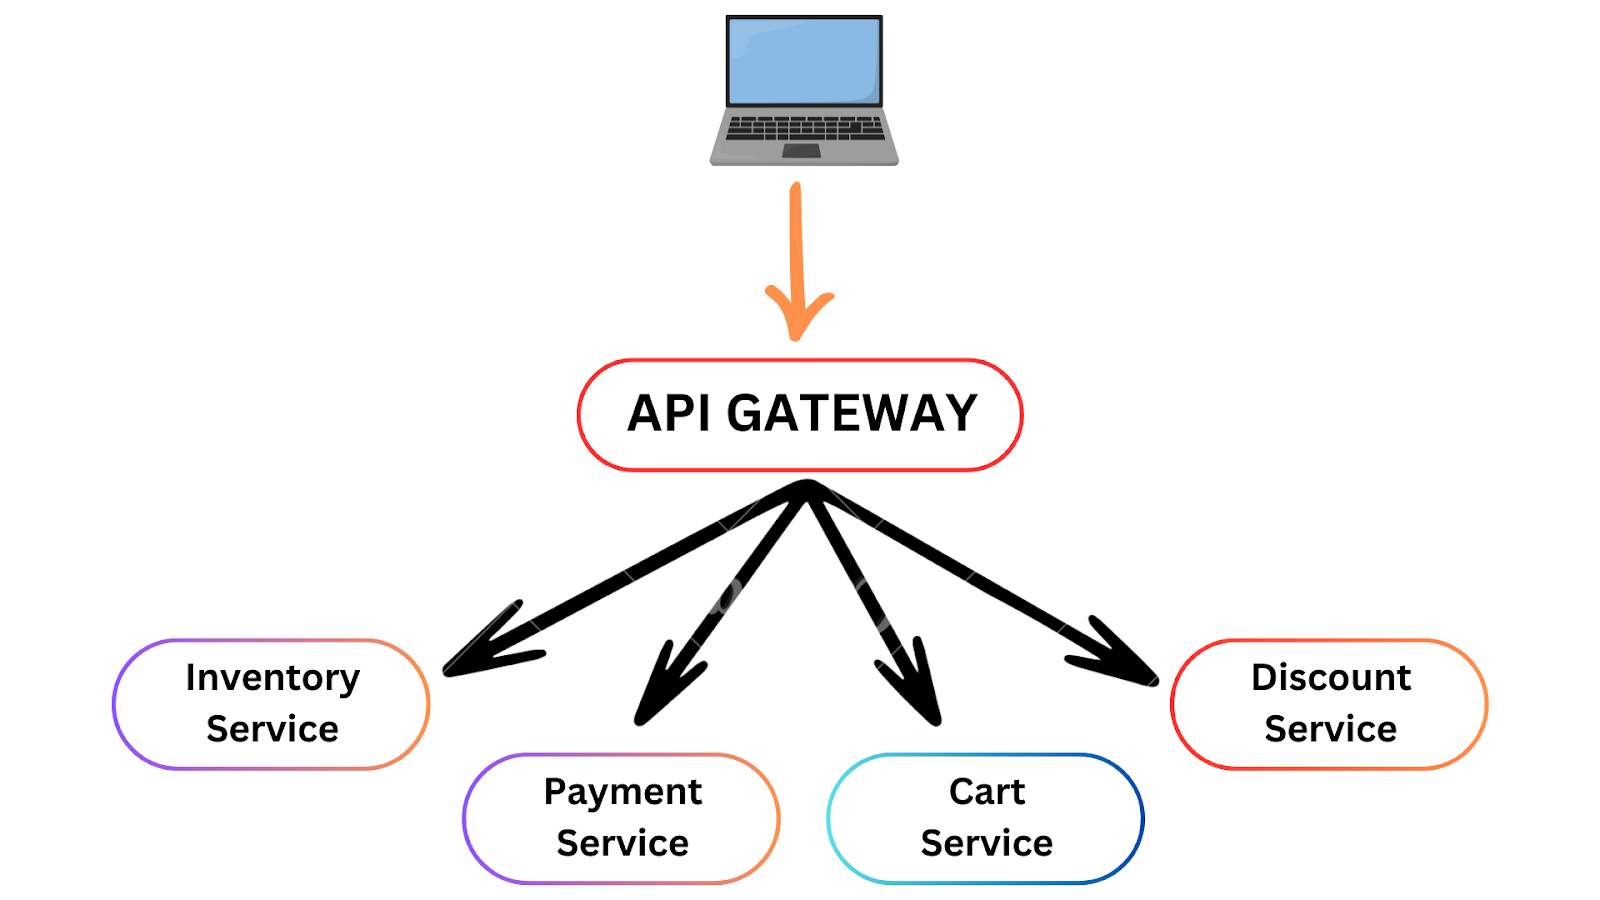
In a micro-services architecture, an API gateway serves as a bridge between client applications and backend services.
This software layer carries out operations including request composition, routing, and protocol translation by serving as a single endpoint for several APIs.
Managing API traffic and implementing security regulations allows the API gateway to govern requests and answers.
Why do we need an API gateway?
Let me explain with a scenario how API gateway helps to solve the black holes
Scenario:
You're developing a social media platform with multiple micro-services, but different client apps handling authentication and data retrieval independently cause inconsistencies and security risks.
Problem:
Inconsistent client handling leads to security loopholes and user experience issues across apps.
API Gateway Solution:
Centralizes authentication and authorization processes.
Manages user authentication and ensures consistent security measures.
Offers a single authentication point for all clients, reducing security vulnerabilities and ensuring uniform access control.
Introducing Kong Gateway
Kong Gateway is an agile, lightweight, and cloud-native API gateway. An API gateway acts as a reverse proxy, giving you the ability to manage, configure, and route requests to your APIs.
Kong Gateway is compatible with any RESTful API and can be extended with modules and plugins. Along with decentralized architectures, it can function in multi-cloud and hybrid cloud deployments.
Major Components of Kong
1. Admin API
For administrative purposes, Kong Gateway has an integrated RESTful Admin API. Kong will maintain configuration consistency amongst all nodes so that requests to the admin API can be sent to any node in the cluster.
Since this API gives complete control over Kong and is intended for internal use, caution should be used when configuring Kong environments to prevent excessive public exposure of this API.
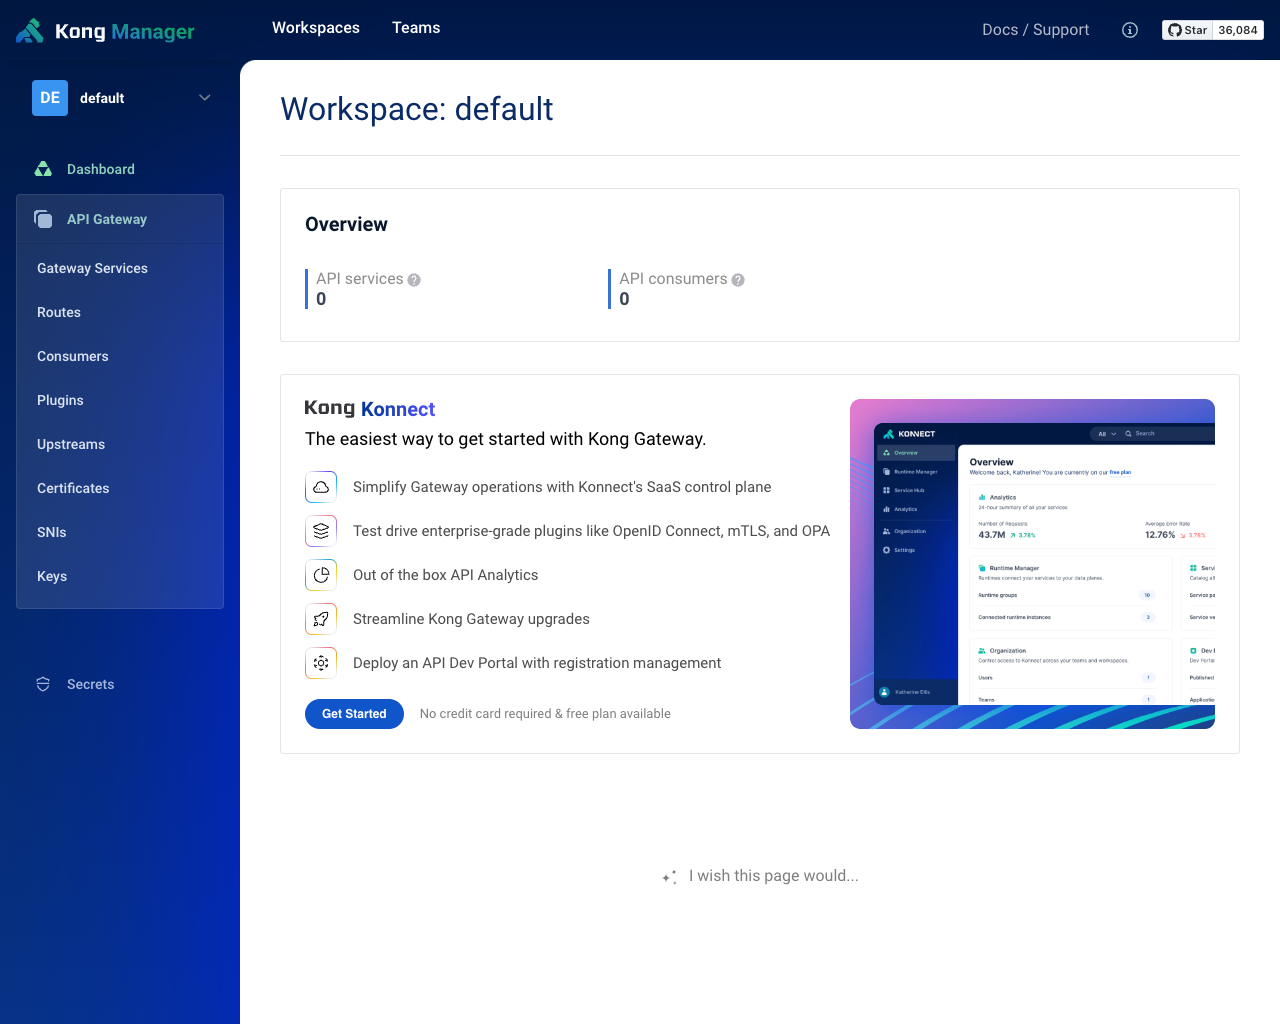
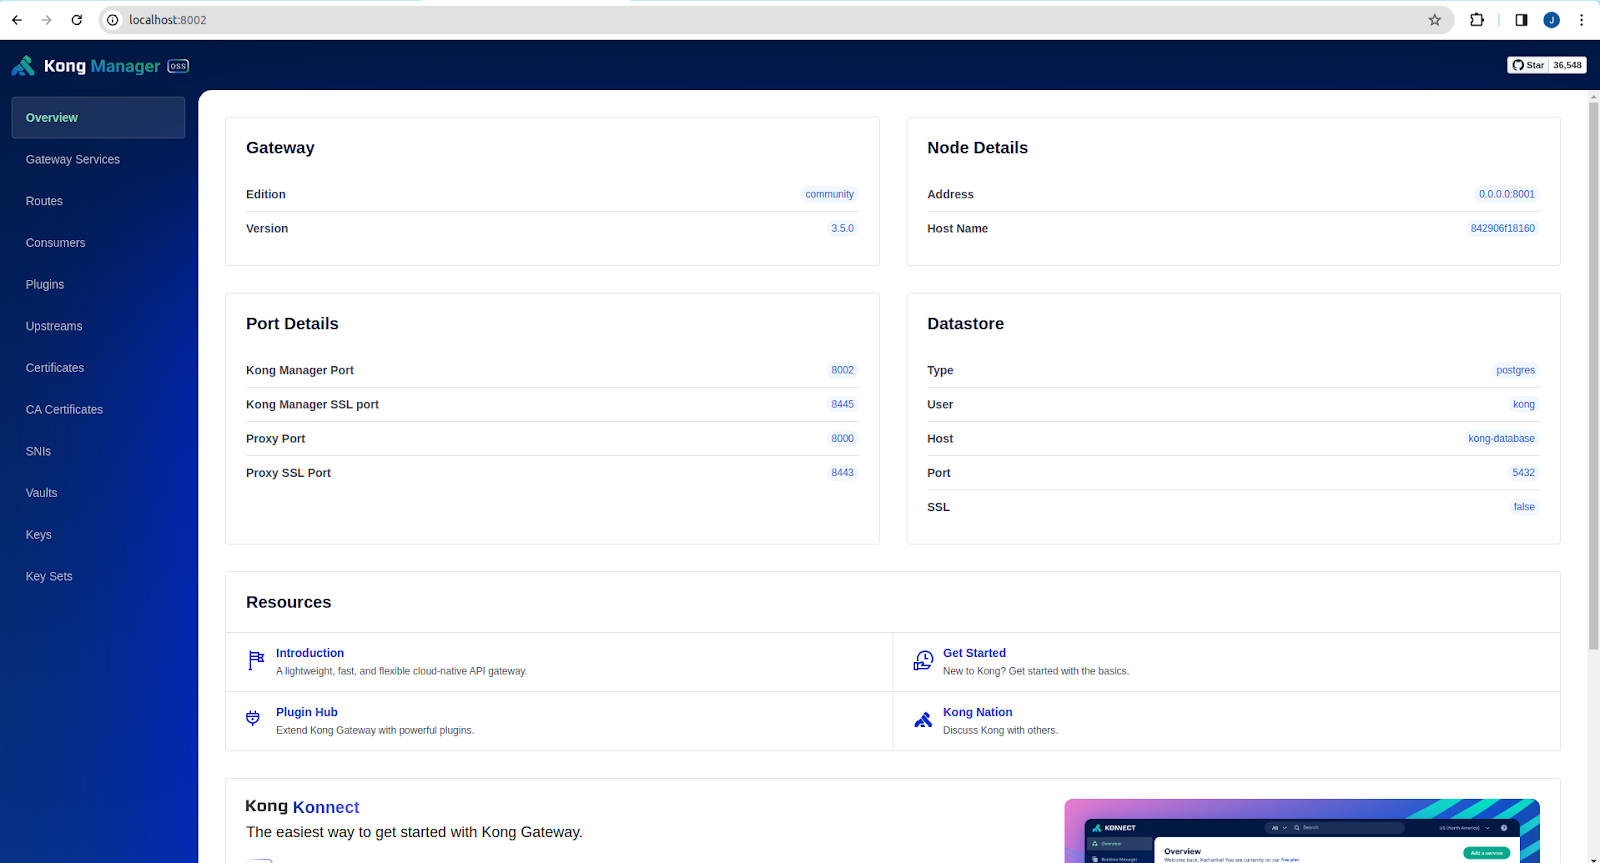
2. Kong Manager
Kong Gateway's graphical user interface (GUI) is called Kong Manager. Kong Gateway is managed and controlled through the Kong Admin API.
Using Kong Manager, you can accomplish the following tasks:
Construct additional routes and services.
Just a few clicks will activate or deactivate plugins.
Assign all of your teams, services, plugins, customer management, and other elements to the groups you desire.
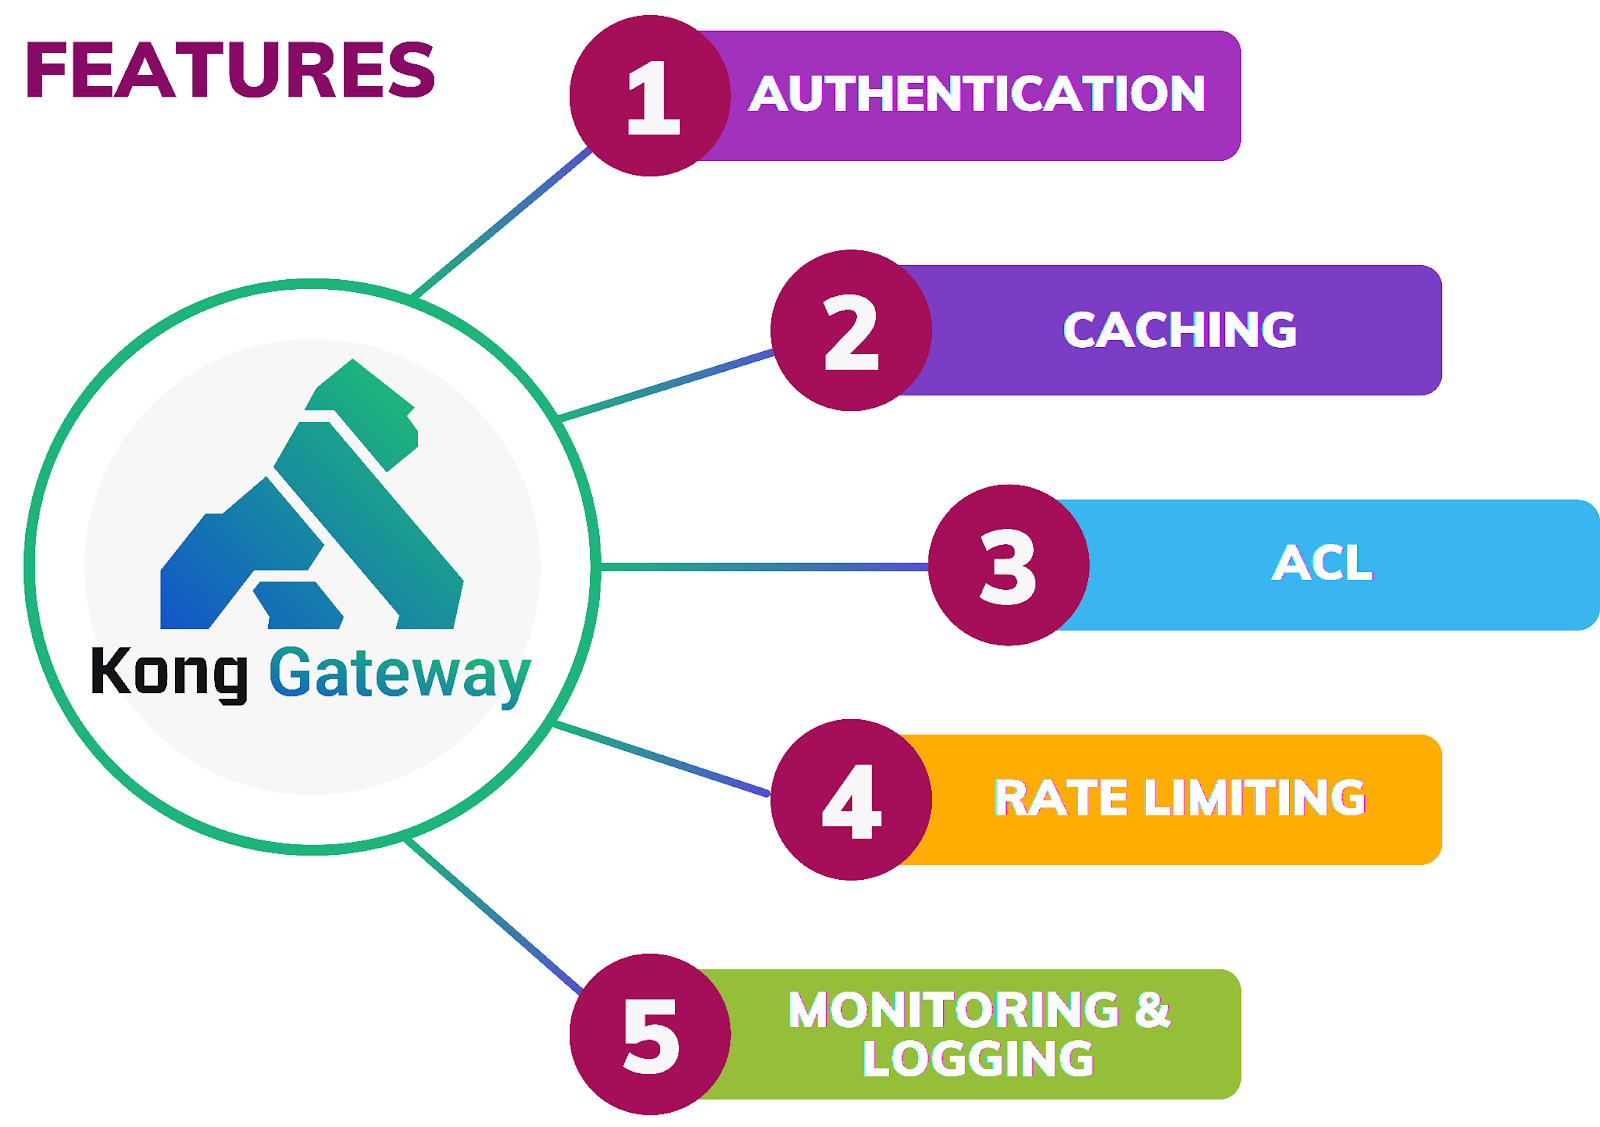
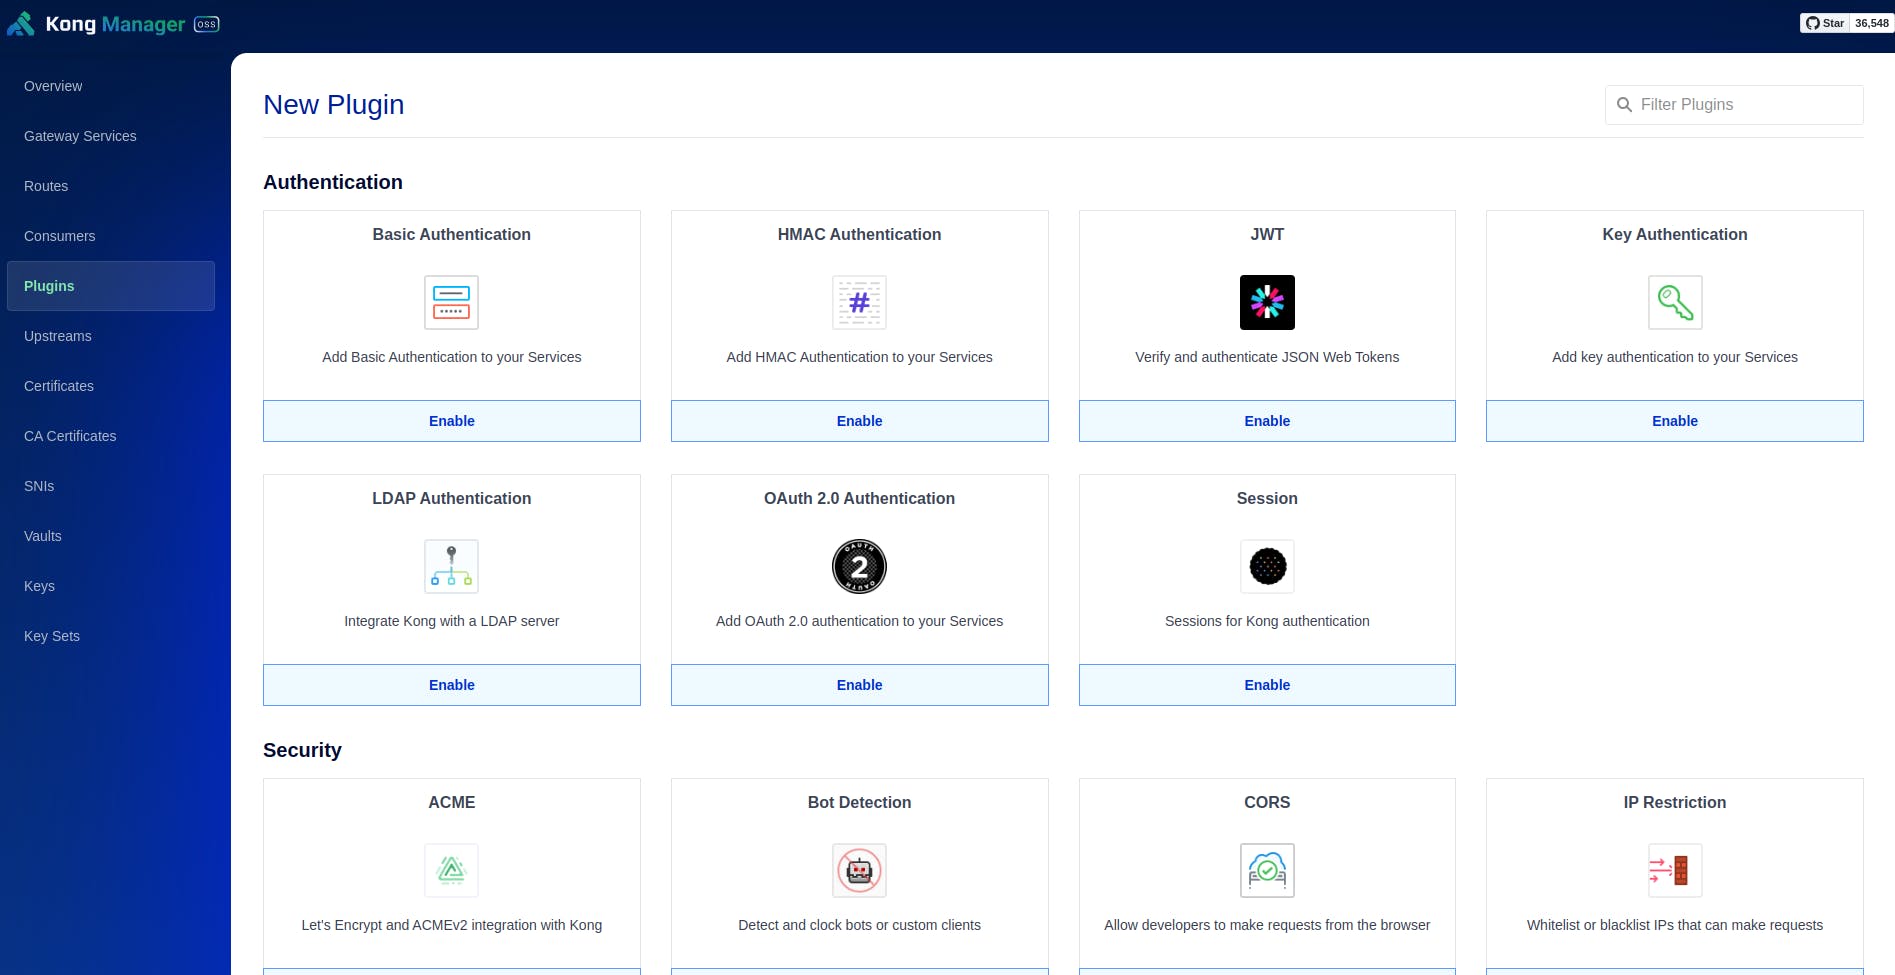
3. Kong Gateway plugins
Kong Gateway plugins provide advanced functionality to better manage your APIs and microservices.
With turnkey capabilities to meet the most challenging use cases, Kong Gateway plugins ensure maximum control and minimize unnecessary overhead.
Enable features like authentication, rate-limiting, and transformations by enabling Kong Gateway plugins through Kong Manager or the Admin API.
Kong Installation Options
There are multiple installation methods for Kong Gateway. Let’s see how to install using docker
Installing with a database: Use a database to store Kong entity configurations. You can use the Admin API or declarative configuration files to configure Kong.
Installing without a database: Store Kong configuration in memory on the node. In this mode, the admin API is read-only, and you have to manage Kong using declarative configuration.
Install Kong Gateway with a Database:
Step 1: Create a docker network for kong
docker network create kong-net
Step 2: Start a postgresql container
docker run -d --name kong-database \
 --network=kong-net \
 -p 5432:5432 \
 -e "POSTGRES_USER=kong" \
 -e "POSTGRES_DB=kong" \
 -e "POSTGRES_PASSWORD=kongpass" \
 postgres:13
Step 3: Start Kong gateway database
docker run --rm --network=kong-net \
-e "KONG_DATABASE=postgres" \
-e "KONG_PG_HOST=kong-database" \
-e "KONG_PG_PASSWORD=kongpass" \
-e "KONG_PASSWORD=test" \
kong/kong-gateway:3.5.0.2 kong migrations bootstrap
Step 4: Start Kong Gateway
docker run -d --name kong-gateway \
--network=kong-net \
-e "KONG_DATABASE=postgres" \
-e "KONG_PG_HOST=kong-database" \
-e "KONG_PG_USER=kong" \
-e "KONG_PG_PASSWORD=kongpass" \
-e "KONG_PROXY_ACCESS_LOG=/dev/stdout" \
-e "KONG_ADMIN_ACCESS_LOG=/dev/stdout" \
-e "KONG_PROXY_ERROR_LOG=/dev/stderr" \
-e "KONG_ADMIN_ERROR_LOG=/dev/stderr" \
-e "KONG_ADMIN_LISTEN=0.0.0.0:8001" \
-e "KONG_ADMIN_GUI_URL=http://localhost:8002" \
-e KONG_LICENSE_DATA \
-p 8000:8000 \
-p 8443:8443 \
-p 8001:8001 \
-p 8444:8444 \
-p 8002:8002 \
-p 8445:8445 \
-p 8003:8003 \
-p 8004:8004 \
kong/kong-gateway:3.5.0.2
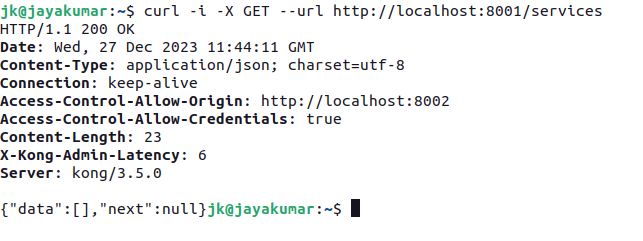
Step 5: After successfully executing all this steps, check that the kong service is up and running
curl -i -X GET --url http://localhost:8001/services
You should get a response like the one below.
Step 6: Check Kong Manager is up and running
Conclusion
Now we have successfully setup the kong gateway in our local using docker, in next blog we will discuss more about services,routes and plugins